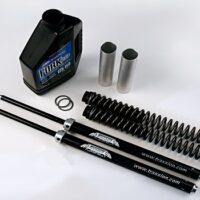
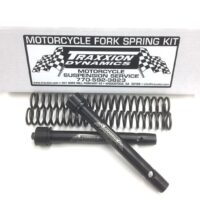
Fork Spring Installation Instructions
We are pleased you that you have purchased our product. Your new fork springs are made of the finest materials available, and put through a rigorous manufacturing process to ensure optimum performance for the life of your motorcycle. Changing fork springs is not always as simple as it sounds. If you have any questions about the installation, don’t hesitate to call. If properly installed, our product will work exceptionally. If you are dissatisfied for any reason, let us know. We want you to be happy with our product.
READ THESE INSTRUCTIONS ENTIRELY BEFORE YOU GO ANY FURTHER!!!
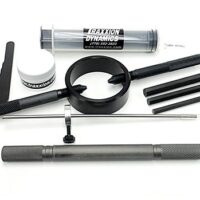
WARNING: If you have cartridge forks, special tools are required to perform this task. Traxxion Dynamics sells high quality, yet inexpensive tools to help with this job.
WARNING: If you are unfamiliar with modern cartridge fork service, stop and seek help from a qualified suspension technician. Racing is an inherently dangerous activity that can cause injury, dismemberment, or death. Do not make it more dangerous by improperly setting up you suspension! Always work in a well-lit area, use the proper tools, and wear safety glasses. In general, springs can be dangerous, and you should work with great caution and care.
NOTE: Before you remove the forks from the bike, loosen the upper triple clamp bolts, and then loosen the fork caps. Do not remove the caps, just loosen them. If one is stuck, place a socket on top of the fork, and whack it several times with a ball peen hammer. This should loosen the threads. Then remove the forks.
You will need a 5″ or bigger bench vise securely mounted on a solid workbench to continue.
General Instructions:
There are three basic types of forks: Damping rod, conventional cartridge and inverted cartridge. Damping rod forks are prevalent on many lightweight and Pre-’94 sportbikes. They are usually non-externally adjustable, and conventional (“upside right”) in design. Conventional cartridge forks usually have brass screws (rebound damping adjustment) and spring preload adjusters on top. All inverted (“upside down”) forks are cartridge forks. If you have any doubts, contact us. You must know what style of forks you have, or these instructions will be useless. Pay close attention to each highlighted section that pertains to your style of forks. Spring installation for these different types of forks is as follows:
1. Remove the Original Springs:
Damping Rod and Conventional Cartridge:
Clamp the fork in a bench vise, using a pair of aluminum jaws (See Figure 1A). Many hardware stores have aluminum vise jaws with a variety of clamping grooves that make this job easier (available from Traxxion Dynamics for $15). Do not grab the fork near the top ( you will pinch the cap and make it difficult to remove), nor in the area where the seal slides (See Figure 1B).
Damping rod fork caps are not held to the fork by a cartridge rod. Slowly unscrew the fork cap. As the cap is removed, it can release with great force. Keep firm constant pressure on your ratchet or wrench, to prevent the fork cap from flying off and potentially injuring you or causing unnecessary damage.
There should be no danger from unscrewing the fork cap on a conventional cartridge fork. If you have this style of fork, you will have to loosen the jam nut at the base of the fork cap, and then unthread the cap.
Inverted Cartridge Forks:
Clamp the fork in a bench vise, using a pair of aluminum jaws (See Figure 1A). Many hardware stores have aluminum vise jaws with a variety of clamping grooves that make this job easier (available from Traxxion Dynamics for $15). Grab the fork by the bottom, on the axle clamp (See Figure 1C). You may need a stool to work on the fork depending on how high your vise is mounted on your workbench.
Unthread the cap from the upper slider. Cartridge fork springs are contained in the fork, and there should be no danger from unscrewing the fork cap.
You will have to compress the fork spring before you can get to the jam nut. This requires a fork spring compressor kit (available from Traxxion Dynamics for $30, See Figure 2A). You will need two people, one to pull down on the compressor tool (See Figure 2B), and one to slip a hold-down tool under the jam nut (See Figure 2C). Then you can loosen the jam nut, and unscrew the cap. Have the same person pull down on the compressor tool, and then remove the hold-down tool. Gently release the pressure on the spring. Once the cap is off, inverted forks must be held by the lower portion of the fork, or the bottom will drop out of the top slider, and a mess will result.
All Forks:
After the fork cap has been removed, extract the stock washers, spacers and springs. It is HIGHLY recommended that you change your fork oil now. If you are not going to change you fork oil, then remove the stock fork spring as if you were unscrewing a bolt. This will keep as much oil as possible in the fork, and only slightly affect the level. At a MINIMUM, you should check the oil level with a fork oil level gauge (available from Traxxion Dynamics, See Figure 3A). We recommend setting the oil by level, not by pouring in a pre-measured volume. Be sure the fork is thoroughly bled using a fork bleed tool (available from Traxxion Dynamics $10, See Figure 3B). A well bled fork will have no “skips” in the stroke as you pull up on the cartridge rod (See Figure 3C). Oil level is measured from the top of the fork tube with the spring out, and all parts of the fork collapsed as far as possible (See Figure 3D). You can contact us for a recommended oil level.
2. Make/Cut Preload Spacers:
Damping Rod Forks:
With the fork hanging in a vise, insert one of the new springs and the washers that go above and below the spacer (some forks only require one) into the fork. Measure from the top of the washers to the top of the fork tube, and record this number (See Figure 4A). Measure from the bottom of the fork cap to the bottom edge of the top lip of the fork cap (this is the lip that will touch the fork tube when the cap is seated), and subtract this number from the first measurement (See Figure 4B). This represents “zero preload”. For non-externally pre-load adjustable forks, add 20mm to your zero preload number. For adjustable forks, add 15mm. Using a tubing cutter, make your spacer this length. Deburr the ends of the spacer, and make sure that it is flat and square on both ends.
Cartridge Forks:
There are two types of cartridge forks: internal top-out spring, and external top-out spring. If you pull down on your lower fork leg, and you can feel a very stiff spring that will only let you pull down very slightly past full extension, then you have external top-out spring (most conventional cartridge forks are external top-out spring). If not, you have internal top-out spring. To verify this, pull up on the damping rod and you should again feel a very stiff spring that will let you pull out only slightly past full extension (most inverted cartridge forks are internal top-put spring).
For external top-out spring forks, conventional type:
With the fork hanging in a vise, insert one of the new springs and the washers that go above and below the spacer (some forks only require one) into the fork. Measure from the top of the washers to the top of the fork tube, and record this number (See Figure 4A). Back the preload adjuster all of the way out. Measure from the bottom of the preload adjuster (where it contacts the top washer) to the bottom edge of the top lip of the fork cap (this is the lip that will touch the fork tube when the cap is seated). Then subtract this number from the first measurement (See Figure 4C). This represents “zero preload”. Add 15mm to this number. Using a tubing cutter, make your spacer this length. Deburr the ends of the spacer, and make sure that it is flat and square on both ends.
For internal top-out spring forks, conventional and all inverted:
Most inverted forks will have to be held in a vise by the lower portion of the fork (axle clamp). If you try to hold them by the upper portion, the lower leg will drop out of the slider and you will have a huge mess! Insert the spring and all washers and small spacers. Pull the damping rod up using a damping rod bleed tool (See Figure 3B). Remove the tool and loosely install the fork cap with the preload adjuster backed all of the way out. Hold the damping rod at full extension, measure the gap where the new fork spacer will go (See Figure 5). This represents “zero preload”. Add 15mm to this number. Using a tubing cutter, make your spacer this length. Deburr the ends of the spacer, and make sure that it is flat and square on both ends.
3. Assembly:
Damping Rod Forks:
Install spacer, washers, and fork cap. Tighten the cap LIGHTLY. Do Not Overtighten! Remove the fork from the vise and repeat the other leg.
All Cartridge Forks:
You must preset the rebound adjuster before you reinstall the fork cap. This will prevent you from having different adjustment ranges on each fork. Back the rebound screw all of the way out. If it does not stop on a “click” turn it back in until it is in one. Turn the screw in three full turns. Pull the damping rod up out of the fork (conventional forks) and install compressor tool kit (inverted forks). Back the jam nut as far down the damping rod as it will go. This will allow you to fully thread the fork cap onto the damping rod. Thread the cap on until it stops turning. Then thread the jam nut up to meet the fork cap and tighten securely. At this point, check to see that the rebound adjuster is “seated”. Do this by trying to turn the rebound screw in further. DO NOT FORCE THE REBOUND ADJUSTER INTO A CLICK!!! IT IS A SMALL WEAK NEEDLE AND SEAT ASSEMBLY, AND YOU WILL DAMAGE IT!!! LIGHT FINGERTIP PRESSURE ON THE SCREWDRIVER IS ALL THAT IS REQUIRED. It should not move clockwise when tested from this point. It should back out if turned counterclockwise. If it will not fall into the last click easily, then loosen the cap and try again. If you back it up one click and turn it back in, it should stop in the last click. NOTE: Not all forks have adjusters that click. If yours do not, then a “click” is considered 1/4 of a turn. Most revalved racing forks should work properly at about 4-6 clicks from full hard, but consult your owner’s manual for your specific application if you have stock fork valving.
WARNING!!!:Failure to back the rebound screw out from “full in” or “full hard” position can cause the fork to respond slowly and seem to “lock up“. The motorcycle will be dangerous to ride and a crash can occur!!!
If all is well, remove compressor kit (inverted forks), then screw the fork cap in, and tighten LIGHTLY. Do Not Overtighten! Remove the fork from the vise, and repeat for the other leg.
Reassemble your motorcycle, and torque all fasteners to factory specification. Do Not Overtighten!
4. Setting the Sag:
First you need a fully extended measurement. I’ve found that the only way to get this measurement with any consistency, is to make sure the front wheel actually leaves the ground slightly. You can do this with a jack under the pipes or a couple of helpers. Measure the exposed area of the fork slider. On a conventional fork, this will be from the bottom of the lower triple tree to the top of the dust seal on the slider. For an inverted fork, this will be from the dust seal down to the top edge of the axle clamp (See Figure 6). Record this measurement on your log sheet. Push down on the fork hard three times to settle the suspension. Now measure the same two points again. Subtract this number from the fully extended number to get your “bike sag” or “free sag” number. Finally, you get on the bike and push down three more times, while a friend balances the bike. Have your friend with the tape take the final measurement. Subtract that from the fully extended number to get your “rider sag”. The measurement we are looking for on the front fork is 35mm. If your spring is of the correct rate, the static sag should be about sixty percent of the rider sag, or about 20mm. The front fork has to have a great deal of static sag so that the front wheel may move down into a hole as well as over a bump. If your fork has too much sag, turn the preload adjuster in. If you don’t have preload adjusters, then you will have to remove your fork spacers and cut longer preload spacers. Adjust in five-millimeter increments. These numbers and this method represent a guideline for you to get a starting point. Although measuring sag sounds simple enough, a thousand people can measure the same bike, and they will get a thousand different numbers. If you are concerned about the numbers you get, contact us. While this method works well for most people, perfectionists may call in and ask for details on a method that takes into account for “stiction”.
Now, go have fun! Remember; please call if you have any doubts or questions. We hope you enjoy your new products!


